Set up a web profile
SmartCentral allows you to set up web profiles for your organisation. Depending on your needs you may set up a profile per service or a single profile for all of your services. Its quite common to take a mixed approach and set up a separate profile per service type (for example if you have multiple vacation care services its convenient to group them into 1 web profile so parents can combine them in a single application).
Before we start with the setup of your web profile check you already have your logo and background colour scheme set.
Go to Account > Setup Org > Setup
- Load your logo file - this will be used on your web profile and also inserted into statements. Any standard image format will work. Mainly you will have a .png or .jpg file. Keep in mind this image needs to be able to fit in the top left corner of your statement so should be no larger than 360px by 120px for best results.
- Select a Colour by clicking on the colour bar and choosing a colour that matches or contrasts your logo main colour
- Scroll to the bottom of the form and click save
Once you have uploaded your logo, it will appear on statements, profile page and so forth.
The simplest case is where you have a single service and therefore only need 1 profile page.
Single Service
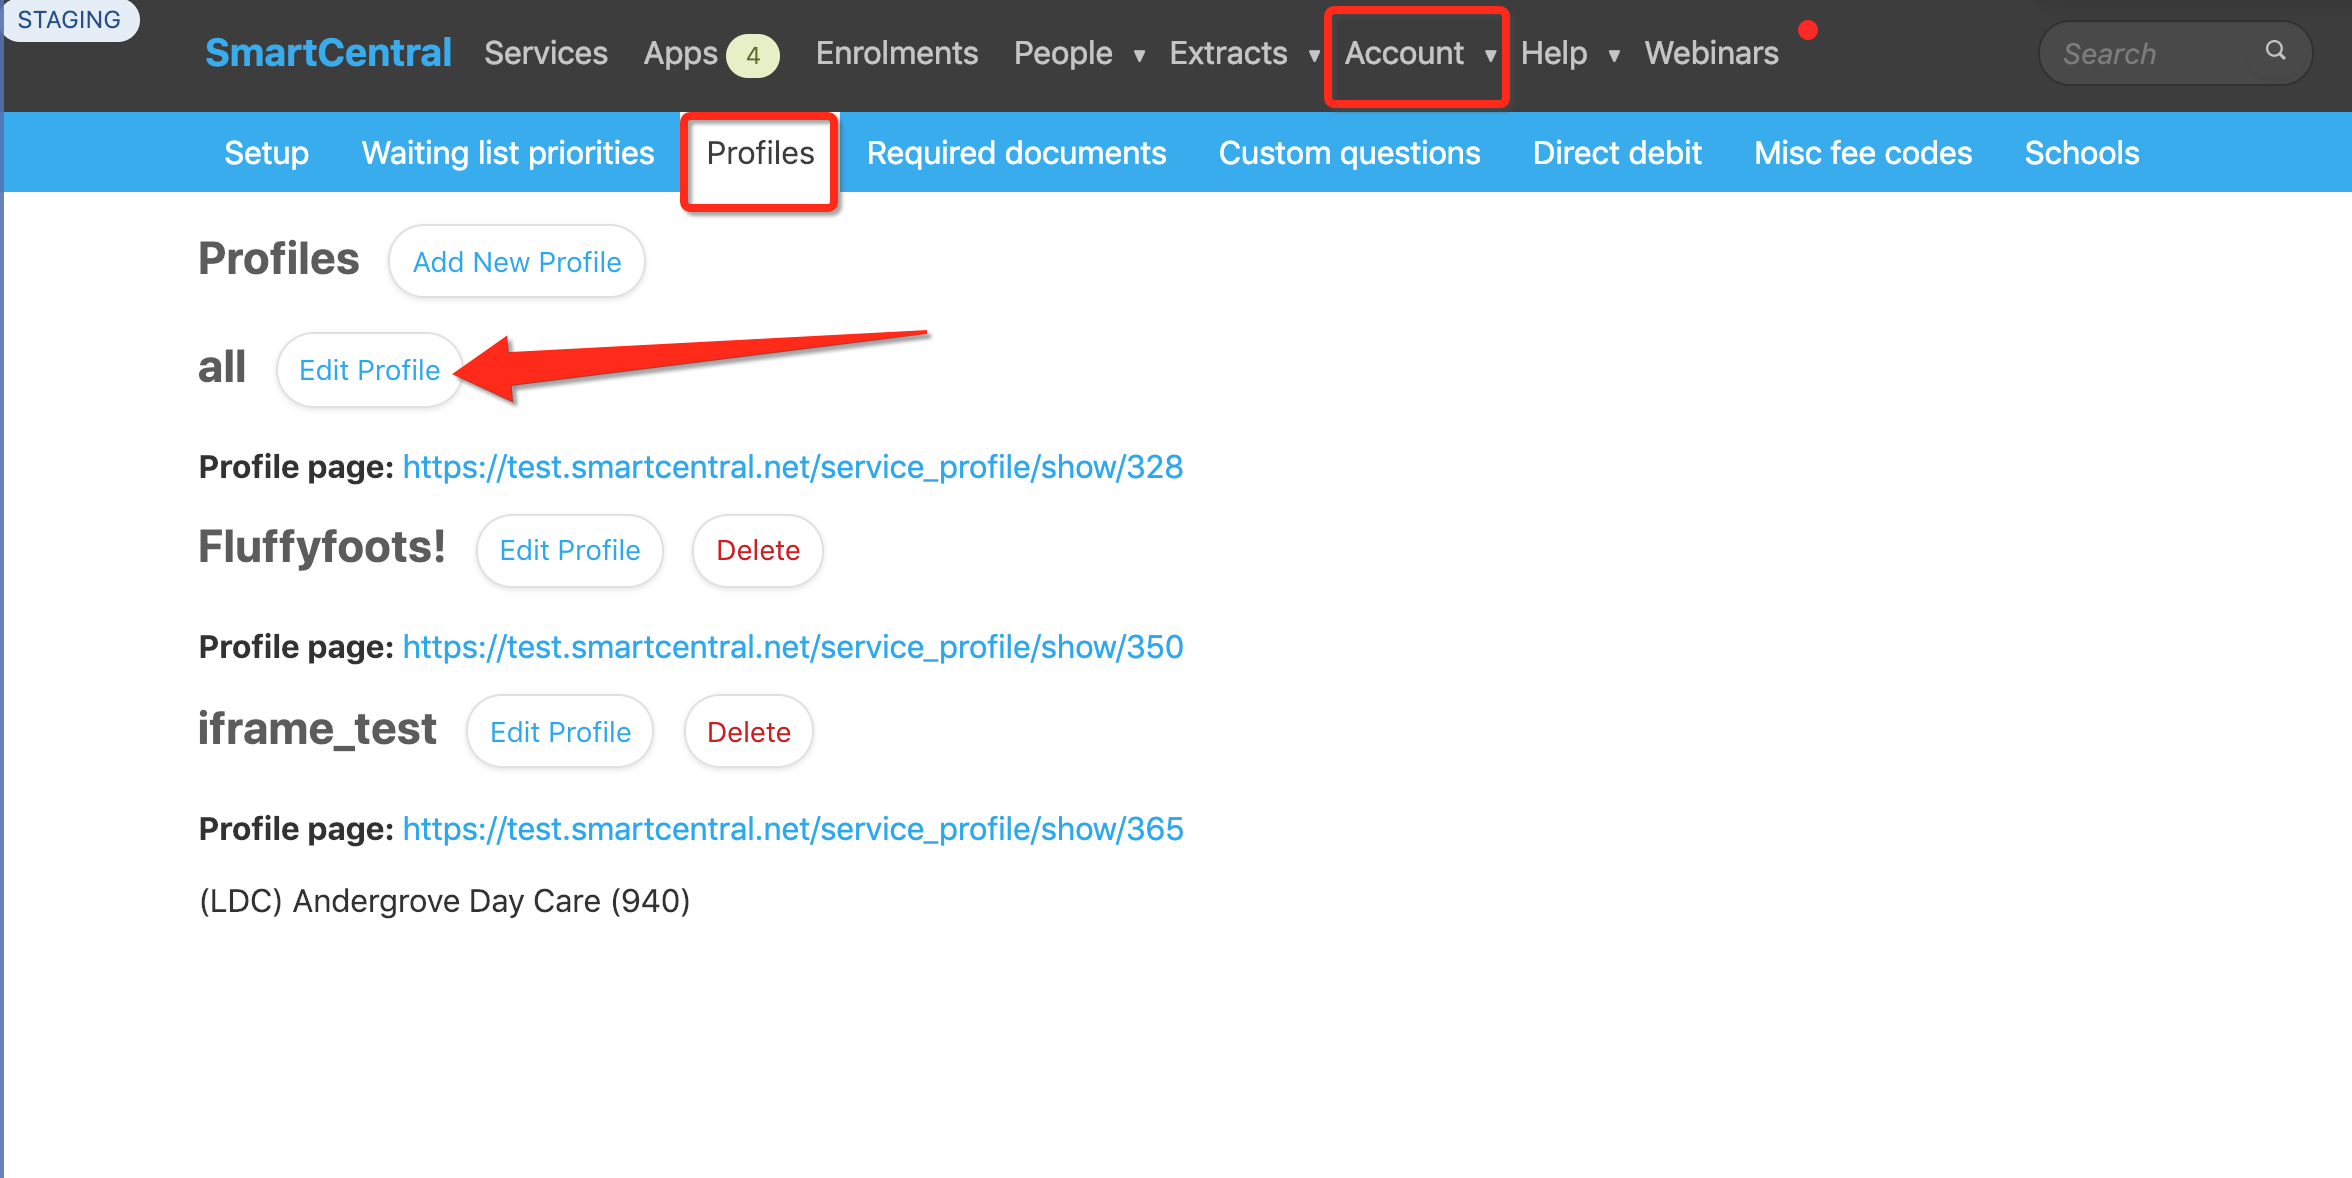
Go to Account > Setup Org > Profiles . A default profile will already exist called All
To view the profile click on the link, it’s worth noting that if you right click on this link and copy that link address, you can paste that in an email to send to parents or include in your Newsletter and that will take parents to your profile page.

The profile page automatically picks up the centre details from Smart Central and inserts a map of your location.
There is some basic editing required in order to set up the profile page. Click on “Edit profile”, the first thing you’ll notice at the top of the page is the profile name and which centres you have linked to this profile page.
Some sample formatting will appear that you can overwrite with your details. you can see a block here which is called the “Introduction”, it includes an instruction code to the system to upload an image and then the text. This will appear beside the map in the Introduction section. Detailed discription section which is below, goes the full width of the page, so that’s the main difference between the two. You edit them the same way, but they’re laid out on the page slightly differently with the Introduction appearing beside the map image and the description section going the full width of the page below those two items.

Markup is a set of coded instructions to Smart Central about how you want the contents to be presented. A hash # on the start of a line by itself, means that this is a heading. You can have one # for a size one heading, two ## for a size two heading etc. You can also bold pieces of text by putting ** in front and behind the text to be bolded.
As well as headings and emphasis (bolding words), you can also insert links. These will be clickable and will go through the the pages that you link it to. The words you want displayed are in square brackets [words] with no spaces in between, followed by the page you want to link which will need to be in round brackets (egWebpage.com), make sure you do not put any spaces in between or it will not work. eg. [click here for handbook](www.handbook.com <- close round bracket here.
The system will read that and say display the word but mark it as a hyperlink and send it to the webpage when it’s clicked. That can be any location or document as long as it’s accessible on the web.

If you have an image instead of a document or a webpage you want to include on this page, the Markup is very similar, you just put an exclamation mark ! infront. That tells the system that is an image !(what I want to call image)[link to the image] and it will include it on your page. Some of the other things that are also on this page control how various things look. The next section below, the application contents, relates to the application form itself.On the application form, there are two blocks of text you can enter. First the “Header” and appears as the very first thing they see when they login to the application and then the application “Footer” which is the very last thing they see just above the submit button.
We suggest that in the “Header” you might put additional instructions for your parents, so if they need extra guidance you can update the wording as it will be the first thing the see before they start, and in the “Footer” you would put things you want to remind them of before they click submit. Many centre’s in the Footer section tend to say “By clicking the submit button you agree to the terms outlined in the Parent Handbook.”

Once they do click “Submit”, they will get a message displayed to confirm that it is a successful submission, and the wording displayed on that page is configurable by you. All three of these boxes follow the same Markup rules as the sections on the profile page, which means you can include links here. So if you want to, for example on the “Successful submission” page, want to send them somewhere else, you can put a link on that page using the Markup that we previously went through. If at any time you’re not sure what that Markup is, click on the blue “Markdown Syntax” and it will show a guide.
In the reminder email, when you request additional information from the parent, there’s a template there that follows the same rules.
You can also define how many “Authorised Contacts” is the minimum required for the application form. You can also temporarily disable applying through this profile, so you might leave that as ticked to disable while you’re setting up or if you need to make major changes and you don’t want anyone applying while you do that. You can temporarily disable the applications or if for any reason you don’t want to accept online applications, but you do want to use the other parent portal functions, you tick the temporary disable box, click save and the profile will still be created, you will still have that webpage but the “Apply” button won’t be on the webpage.

Multiple Services
Go to Account > Setup Org > Profiles . A default profile will already exist called All that you should edit as you would for a single service. You can opt to choose individual services and add new profiles for each (an example is one profile for BSC/ASC and another for VAC), or choose all of your sevices on the main profile with links to each new profile you create, and disable applications on the main page, directing parents to each service seperately. The support team can advise what solution will work best for your business and assist you with the set up.
To add new profiles select Add New Profile, give the new profile a name and select the service/s you want to direct parents to apply at.